HMAS Adelaide
From Warlike
Q2494128
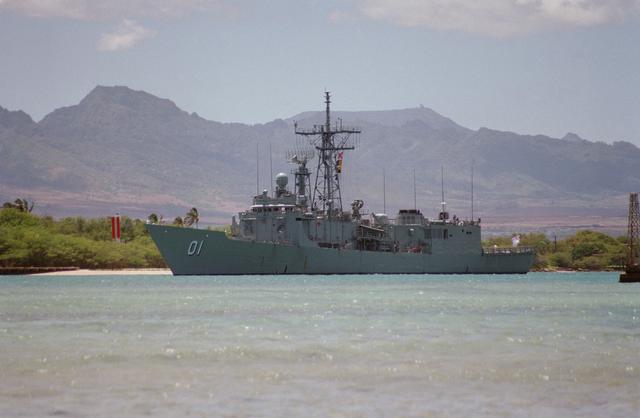
HMAS Adelaide was the lead ship of the Adelaide class of guided missile frigates built for the Royal Australian Navy (RAN), based on the United States Navy's Oliver Hazard Perry-class frigates. She was built in the United States and commissioned into the RAN in 1980.
Wikimedia, Wikidata
FFG 01; FFG 01
length 139 metre, speed 30 knot, beam 14 metre, draft 6.7 metre,
United States Navy, Royal Australian Navy, Todd Pacific Shipyards Corporation, 
-
Location: -33.4667, 151.45, KML, Cluster Map, Maps,
-

HMAS Parramatta ⓘ
1910 River-class torpedo-boat destroyer -

HMAS Paterson ⓘ
wooden auxiliary minesweeper operated by the Royal Australian Navy during World War II -

HMAS Swan ⓘ
1915 River-class torpedo-boat destroyer -

HMAS Doomba ⓘ
1919 Hunt-class minesweeper
1977-07-29T00:00:00Z
1977-07-29T00:00:00Z
keel laying
1978-06-21T00:00:00Z
1978-06-21T00:00:00Z
ship launching
1980-11-15T00:00:00Z
1980-11-15T00:00:00Z
ship commissioning
2008-01-19T00:00:00Z
2008-01-19T00:00:00Z
ship decommissioning
{"selectable":false,"showCurrentTime":false,"width":"100%","zoomMin":100000000000}
 HMAS Adelaide
 HMAS Adelaide 1982
 HMAS Adelaide Tobruk 1992
 US Navy 040928-N-7034S-003 The Royal Australian Navy guided missile frigate HMAS Adelaide (F01) conducts a patrol near the Khawr AL Amaya Oil Terminal (KAAOT) during joint operations with Coalition forces
 US Navy 040929-N-7034S-005 Royal Australian Navy Sailors make final preparations before pulling along side the fast combat support ship USS Seattle (AOE 3) and the amphibious assault ship USS Essex (LHD 2)
 US Navy 040929-N-7034S-001 A 9mm pistol casing flies in the air as a Sailor assigned to the Royal Australian Navy participates in a small arms live fire exercise on the fantail of the Royal Australian Navy frigate HMAS Adelaid
 US Navy 040929-N-7034S-004 An Officer assigned to the Royal Australian Navy, uses a sextant to measure the distance between her ship, HMAS Adelaide (FFG 01), and the fast combat support ship USS Seattle (AOE 3)
 US Navy 041104-N-4772B-058 Boarding team members from the Royal Australian guided missile frigate HMAS Adelaide (FFG 01) conduct a fast rope exercise from an Australian S-70B-2 Seahawk
 HMAS Adelaide Leaves the Port of Darwin for the last time
 HMAS Adelaide Leaves the Port of Darwin for the last time (2)
_conducts_a_patrol_near_the_Khawr_AL_Amaya_Oil_Terminal_(KAAOT)_during_joint_operations_with_Coalition_forces.jpg)
_and_the_amphibious_assault_ship_USS_Essex_(LHD_2).jpg)
,_and_the_fast_combat_support_ship_USS_Seattle_(AOE_3).jpg)
_conduct_a_fast_rope_exercise_from_an_Australian_S-70B-2_Seahawk.jpg)
.jpg)